Sunday, January 29, 2017

Green Deep Cleaning: Day 10 - Walls and Floors

Today, we follow up our cleaning of the washer and dryer today, with cleaning the rest of the laundry room.   Now that we've moved all of the lint out of the dryer, we can be sure to remove all of the lint from around the area as well.

What you will need today to clean:

Today's directions may be more individual for you, so I will just list the things you will need to do to make this area clean.  You may have to add things, or some suggestions may not pertain to you, if you don't have a laundry room.

What to clean:

  • If you have laundry cabinets, empty them out from top to bottom, wipe them down with the Envirocloth.  If these cupboards need to be cleaned and oiled on the outside, see my post HERE about how I used vinegar and oil for this.
  • Dust the walls down.  This is something, I'm not sure I've ever done before owning the Superior Mop System,  but now, I love to dust and wash the walls!  You'll want to lock the Mop head into place, put the dust pad on the mop and wipe down all the walls with the mop. After the walls are dusted, clean up the floors and space under the washer and dryer.


  • Follow the dust pad with the wet mop pad.  You'll want to get that pad wet before putting it onto the mop.  Wipe down the walls and floors with the wet Mop.
 
  • Finish cleaning up any other areas of the laundry room that we missed.  Comment below, if I missed something, so I can share that as well!
Since we've been talking a lot about the Superior Mop System lately, I do want to tell you a little bit about it.  Here's what makes the Mop so special!
One thing you'll want to add to your Superior Mop System is the Rubber brush.  This little brush will clean up that dust pad so quickly. 
 
Now the kitchen and laundry room are finished.  Are you hanging with me in Green Deep Cleaning your house?  We'll be moving on next to the living room. Stay tuned.  


Thursday, January 26, 2017

Green Deep Cleaning - Day 9: Laundry

My laundry room is part of my bathroom, so I don't have a separate room to clean, but there are some basic messes that are needing regular deep cleaning regardless.  Like the kitchen, the appliances should be cleaned up first, so I will give here some ideas on how to get those appliances and area around them cleaned up.  Tomorrow, we will clean up the rest of the room.  Overall, I want the Deep Cleaning to happen, but not take an entire day. 

What you need to clean the washer and dryer:

I am going to start with cleaning the washer and dryer, as cleaning them will certainly create some extra lint in the rest of the room!

Washing Machine

  • If you are able, clean out all the traps internally.  My front loading washing machine, doesn't really invite you to do this, but we discovered this about 8 years ago, when our washing machine stopped working and we didn't want to pay for an appliance person to come check it.  Mr. Right took off the front panel, and found a trap (not mentioned in the instructions, or even specs of the machine!).  It simply screws off and can be emptied.  I get in there with my Envirocloth and really get out any mildew that has built up in there.
  • Next, using the Envirocloth, clean ever surface, inside and out of all lint and mildew. 
Take that drawer for the detergent out, wipe that down, AND clean that drawer cavity out too.  (You should remove this drawer every time you are finished washing and dump it out.  It has a habit of growing mold and mildew because it is always wet.)
Washer Detergent Drawer Removed

  • Run a cycle without clothes and fill the detergent cup with white vinegar.  This will work on that mildew internally.  Some people say that it will dry out the rubber components for your washing machine, but I've had my front loading machine for 10 years, and it's still working fine, with now notable damage.  Do this at your own risk.
  • Clean any shiny surfaces and windows on the washing machine with the Window Cloth.
  • I don't have the ability to get under my machine because it's up on a platform, but I take that Envirowand, spritz it with water and wipe under and behind the machine where I can't reach with my hands or Mop.
  • Pull machine out from the wall, and use the Superior Mop System to clean the wall and floor behind the machine.

Dryer

  • Mr. Right was forced to take off the panels off the dryer recently, because we burned up an electrical panel, but this offered a great opportunity to clean it all out.  Mr. Right prefers to clean motors and electricals off with blowing air, instead of vacuum power.  Our Vacuum, has the ability to do this , so that's what Mr. Right did, blow out the internals of the dryer.  Warning: This makes a huge mess!!!  Close the door and be prepared for a big blowout!
    Dryer with Front panel off and cleaned by Mr. Right!
  • The Envirowand can be bent to clean out the dryer vent!  If things are stuck on, you can even spritz it with water to get those hard to clean places. This is so awesome!  I love it!
  • While that Envirowand is in your hand, go ahead and get all those places that you are unable to reach move the dryer away from.
  • Take the Envirocloth to every surface you can reach and wipe it down with just water.  Don't forget the inside of the dryer as well!  I find stickers and things in there sometimes, you just never know!
  • For shiny places and windows, use the Window Cloth to make them shine again.

Stay tuned for the rest of the laundry room on Day 9!

Wednesday, January 25, 2017

Sneak Preview!

I just had to share with you that there's some sneak preview's and exclusive buys before one of my favorite company's release of their new catalog in February.  Check it out!  You can join my Facebook group to stay up to date on all of the new and upcoming products!
Get It!

Get It1

So Cute Now!
 Stay posted on all the new stuff on my Private Facebook Page!
So Cute Now!

Tuesday, January 24, 2017

Green Deep Cleaning: Day 8 - Floors

This is the final day of Deep Cleaning the kitchen!  Whew!  Thanks for sticking it out! 

What we've deep cleaned in the kitchen so far:

For the final day in the kitchen, we're going to deep clean the floors.  Now, if you are like me, the floors get washed regularly (1-2 times per week for me).  I love to use my Superior Mop System for getting the kitchen clean.  Every time I use this Mop, I am so excited to use only water to get my floors clean!  No more chemicals that my children and pets can be harmed by.

I want to share a How-To Video.  I signed up to be a consultant so that I could get my Mop!  Let me know if you'd like more details.

What you'll need to green deep clean the kitchen floor:

  1. Superior Mop System
  2. Scrubby Corner Cloth
  3. Dusting Mitt or Envirowand
This Mop does a great job getting all the floors and baseboards clean (you can move the pad to one edge of the Velcro, and get a flap, that goes up all the baseboards to clean the baseboards, but to deep clean the floors today, here's what we're going to do just before a good mopping of the floor:
  1. Wipe down all of the tops of the baseboards.  I tend to do this with a slightly wet Dusting Mitt, wiped across the top of the baseboards.  You can use the Envirowand that is spritzed with water, so you don't have to clean on your hands and knees, but since the next item is going to require getting on the floor anyway, I prefer the hands on Dusting Mitt with a little water on it.
  2. Scrub that crack between the floor and the baseboards with the Scrubby Corner Cloth.  I used a butter knife inside the corner to clean that crack up really well.


3.  Scrub the corners really well, especially under the cabinets. (This is the worst in my kitchen, because all the corners have an unreachable corner.  No broom or mop can reach these little corners!)
 
4.  Finally - sweep and mop the entire floor!
 
That's it!  I know, on your knees for a lot of this cleaning job, but getting that deep cleaning done is so rewarding! 

Monday, January 9, 2017

Green Deep Cleaning: Day 7 - Woodwork

Today's Green Deep Cleaning is going to be cleaning and oiling all of that woodwork in the kitchen.  For the everyday, general dusting, I love to use the Envirowand with the Dusting Mitt

This time though, we're going to really get all the sticky grime that gets on the woodwork in the kitchen.  My table set also gets pretty bad with all the things the kids get smeared on there, so if I can really work on getting those clean twice a year, I am happy.

What you will need for Green Cleaning today:
First, you'll take the Envirocloth and wash down any of the wood surfaces with just warm water on the Envirocloth.   If you are doing China Cabinets and other fine cabinetry, you won't want to do this step on them. For me, this step includes my kitchen table and chairs, my window sills (my window sills are always moist, so they often have a coating of water and mold) and my cabinet fronts.  Oh, don't forget to get any wood trim or doors in the kitchen.


Next, you make a mix of equal parts vinegar and olive oil in the bowl.  This concoction has two purposes:  the vinegar cleans the wood, and the oil moistens the surface, which will absorb it and keep the wood in good condition.

You may not be able to see the difference, because this solution doesn't fix any loss of stain, but in "real life" it looks 100% better! 
Take your old towel and dip it into the oil/vinegar and rub it on all the wood surfaces you can find in the kitchen.  Some wood cabinetry may have a shiny finish, so the oil won't absorb as well.  For these shiny furniture pieces, I will use a very thin coating of the oil/vinegar mix, and then rub over it with a dry cloth to be sure it shines up, but doesn't have a pool of oil sitting on the surface.

This may not take you very long to do, but for me, this does, because everything is wood in my kitchen. 

Friday, January 6, 2017

Green Deep Cleaning: Day 6 - Dishwasher & Microwave

Today we are going to clean the dishwasher, microwave and any other small appliances that need some deep cleaning. We are now done with all the cupboards and pantry, so no need to do that.

How to Green Deep Clean the Microwave

For this job, you will need:

The best way I've found to clean all the stuck on food inside of the microwave, is to loosen the food up with hot moisture.  Here's what I did:
  • Fill the glass bowl with water.
  • Add a couple of teaspoons of lemon juice to the water.


  • Cook water in microwave 2 minutes at a time until the water is hot and steamy, and so is the microwave.
  • Wipe down the microwave with the Envirocloth.
  • Shine all of the glass parts with the Window Cloth.

How to Green Deep Clean the Dishwasher

One of the best ways to clean the dishwasher clean is to keep it clean all the time!  One of the best items that I have found to prevent build up inside the dishwasher, is the Magnet Ball.
This little ball stays in your dishwasher all the time and prevents the calcium build-up.  I noticed right away that my dishes were much cleaner.  We have very hard water, and this has been a little timesaver as well as making our detergent working better with less.
What you'll need:
Just like the Microwave, I like to start my cleaning of the dishwasher with loosening up the stuck on food and gunk.  Here's what I did:
  • Either sprinkle citric acid/lemonade packet or baking soda in the bottom of the dishwasher.
  • If using Baking soda, pour about 1/2 cup of vinegar into the detergent dispenser.
  • Run a hot water cycle of your dishwasher.
  • Next take a look inside and see what needs to be scrubbed out of the inside.
  • If you have calcium deposits on the inside, you can spary some Descaler on and used the Scrubby Corner Cloth to scrub it out.

  • Wash down around the seal and gasket of the door.
  • Wash down the outside of the dishwasher.  Use the Window Cloth on the shiny surfaces to make it really shine!
Now you'll want to deep clean any of those small appliances we haven't gotten to yet. For me that includes several crock pots, a rice cooker, toaster, Kitchen Aid, food processor, etc.  Don't forget to clean your coffee machines!  That Scrubby Corner Cloth works fabulous for these.  If you need some extra elbow grease, go ahead and use some of that Cleaning Paste.

My Disclaimer:  I work hard to earn a living, and one of the avenues of income that I enjoy is commissions from my Norwex business.  If you'd like to have everything I've been posting this week, but would rather earning your own commissions and great Green Cleaning products, go here today.

Thursday, January 5, 2017

Green Deep Cleaning: Day 5 - Cupboards & Pantry

Today, we're going to finish up the rest of the cupboards and pantry in the kitchen.  (Don't worry about the pantry, that will be tomorrow!) Hopefully, you've got this down, and have made a dent in cleaning out the cupboards.  You can go to my description on Day 1 to see how I go about cleaning out the cupboards.

 I do some purging while I'm cleaning it out as well. Take out anything that is old, or not used very often and get rid of it.

I have put together some organizing inspiration in a Google Album.  I'm not going to lie, here are a couple of my dream pantries!  I just love everything to have a place and a box.


Of course, to try to help my family make ends meet, I am an Independent Thirty-One Consultant, so if you want to start having your pantry look this great, I would greatly appreciate your support.  Please contact me directly through the website if you need my personal assistance.

Wednesday, January 4, 2017

Green Deep Cleaning Your House: Day 4 - Sink

Today we're going to scrub down the sink and clean and straighten out that cupboard under the sink.  (See Day 1, for how I clean the cupboards)

For the sink, you'll want to have on hand:
My sink is stainless steel, so here's the results
To clean the sink:
  • Get the Spirisponge or Envirocloth wet.  Dip into the Cleaning Paste.  Scrub down the entire sink.
  • Get around the edges, in the cracks, the backsplash, and the faucet too.
  • If the faucet has water stains that don't come off easily, use some Descaler to get rid of the water stains.  This can also be used on the drain as well.

Here's another example of this working in the sink

  • As long as we are in the scrubbing mood and have the Cleaning Paste out, go ahead and choose a couple of pans to get all that grungy black stains off as well.  You may want to use that Oven & Grill Cleaner to get the metal pans clean.  Every time I clean the dishes, I try to make more headway on a pan or two.  This will be a good time to do that, since your in that area.
Spirisponge & Cleaning Paste
Spirinett & Cleaning Paste

Which Spiro to Use When?

  • Spirisponge - Any surface you think might scratch, ceramic, glass, non-stick, tephlon, etc.
  • Spirinett - Metal pans and non scratch surfaces.  I always try this on a little area first, before going ahead.  Mr. Right took off the enamel with this one on my stove top.


  • Don't forget to move down to that cupboard under the sink and clear it out, clean and reorganize it.

Are you keeping up this week?  I'd love to have you share some of your Before and After pictures too!

Tuesday, January 3, 2017

31 Days of Green Deep Cleaning: Day 3 - Ceilings and Windows

We've had a couple of rough days, tackling the oven and the refrigerator!  (Seriously not my favorites!)  Next we are going to move upward in the kitchen.  Don't forget to clean another set of cupboards today.  You can check out my how-to over here for that! 

Today our big Green Deep Clean is getting away from the appliances for a bit, and going to be cleaning up high and the windows!  Are you excited? I am.

Here's what you will need for today's cleaning:

I don't know why, but it seems like the spider webs get pretty crazy in the months of December and January.  Maybe they've just decided to settle in for the long winter months, I'm not really sure!  Of the cleaning and dishes that get done in the kitchen, I rarely dust or even think to get rid of the cobwebs.  Here's what we're going to do:
  • First start by taking down all the light fixtures.  I just wash these in the sink in Dishwashing Liquid
  • Before putting the fixtures all back, go around the entire room from one side to the other, top to bottom, with the Envirowand clearing all the dust and cobwebs out.
  • Use that Envirowand on the fan blades if you have one.  I love how you can shape this so it fits just perfect to your fan blades!

  • You'll want to use your Dusting Mitt for getting all the shelves, knick knacks, etc. in the kitchen.  The Dusting Mitt can be sprayed with a mist of water and used to pick up that dust that is sticky and greasy from cooking in the kitchen.
  • Move onto the windows in the kitchen.  Unfortunately, if you live in a cold weather climate, like I do, you can only do the inside windows. You want to wash each window with the Envirocloth and then dry it with the Window Cloth.  The great thing about using the Envirocloth to wash the windows, is that you can also wash out and of the window sill that needs it at the same time.
Here's my demo of how great the Envirocloth and Window Cloth work together.  Of course, if you order from my Website, I do earn a commission that helps my family out. 

Monday, January 2, 2017

31 Days of Deep Cleaning Your House: Day 2 - Oven

It really seems like the kitchen has some doozies for deep cleaning, with all of the appliances!  Don't forget to clean out at least one set of cupboards today.  You can check yesterday's post HERE for the how-to.  You'll not have a problem joining in and catching up today!
 
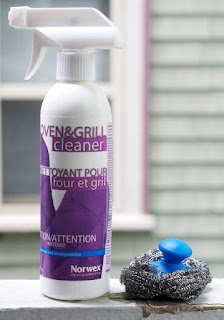
 The oven is one of those things we all hate to clean!  Most chemical based oven cleaners are so toxic, you might wonder if you'll survive the process!  My new favorite for Green Cleaning is the Oven & Grill Cleaner for the oven.  Instead of toxic chemicals, this product uses enzymes to break down the grime!

Here's what I'll be using to clean the oven:
 
  • To use the Oven & Grill Cleaner, you warm the oven up, turn it off and then spray it all over the inside.  I shut the oven at this point and went on to clean the other parts of the stove.
  • Take all the stove top pans and burners off.
 
  • Fill the kitchen sink with hot water and 1 teaspoon of Ultra Power Plus Laundry Detergent and put the burners in to soak.  (yes you read that right!  The Laundry Detergent works wonders on grease!)
  • Take off the stove top if you are able.  All parts of the stove will come off fairly easily.  If you have an electric stove, you can unplug the electrical parts to get the top off.  Here's what that looks like.
  • This is the after picture.  This part of my stove was just disgusting and burned on!  First, I sprayed some of that Oven & Grill Cleaner on there to loosen it up.  Then I used my Spirosponge to scrub away.  This did take some work, but It was well worth it!
  • Next, (Oven was still soaking) I took the fan cover off, and discovered that there wasn't even a lightbulb in there!  After wiping up inside the fan area down with the Spirosponge, I replaced the lightbulb.
  • Meanwhile, I filled the other side of my kitchen sink with the UPP Laundry Detergent and put the fan cover in there to soak.  I literally, just had to wipe off a couple of spots on the edges to get this looking like new!  I love not having to scrub!
This is the same fan cover!  I didn't realize that I didn't have it turned the same way!
  • At this point, I went back to those soaking pan covers, wiped them down and used the Spirinett to clean those pans.  It does scratch those pans while cleaning, but I really just wanted them to look clean and shiny.  If you worry about the scratching, use the Spirisponge instead.  Just an fyi, DO NOT use the Spirinett on the enamel paint of the stove top!  It will remove the enamel.  That's why my stove top looks dirty!  My hubby was helping out one day and cleaned my stove top with the Spirinett and took off the paint!! Don't do it!
 
  • The oven door comes off, so you can access it easier.  Just pull up at an angle. It may take more than one person to put it back, but so worth it to clean the oven out.  Now it's time to scrub and clean that inside.  A few places, I had to reapply the Oven & Grill Cleaner to really get off those burned in places, but it was so much better than all the chemicals I usually have used!
  • Clean out the drawer.  Apparently this is supposed to be a warming drawer?  I use it for my pot lid storage, so I found that all my lids needed a good cleaning.
  • Pull the stove out, clean the wall and floor underneath.  The Superior Mop System works wonderful and fast on the both the walls and the floor!  Love it.
When I was in the oven, Mr. Right found that the light wasn't working inside the oven.  When he checked it, it wasn't screwed in all the way!  We were so excited to not have to replace that.
 
There you have it, I clean oven and surrounding area.  Stay tuned for more Green Deep Cleaning Your House! 


Sunday, January 1, 2017

31 Days of Green Deep Cleaning Your House: Day 1 - Refrigerator

Usually we associate deep cleaning your house with Spring Cleaning, but there's something about the New Year that makes me want to clean and organize my house.  Because of my and my children's allergies, and because of the cost, I've tried really hard to keep my cleaning as clean as possible.  I often make my own mixes for cleaning. You can see my laundry detergent recipe HERE.
 
In November, I started to switch my household over to Norwex Clothes, which for the most part can clean 90% of your house with only water!  This I love!  Water is free (mostly) and the clothes pick up 99% of the bacteria, as well as have a special BacLock feature that prevents the bacteria from spreading.
 
So, for the month of January, each day, I am going to feature one area of your house that can be deep cleaned.  I'm going to be giving time saving tips as well as how-to instructions for doing this deep cleaning the best and greenest.
 

This first week, we are going to clean the kitchen.  To start the kitchen off, I'm starting with the refrigerator.  I don't know about you, but this tends to be the last on my list for cleaning.  Mostly, because the really dirty part is behind closed doors. 

In addition to the refrigerator today, try to empty out and wash down one cupboard.  This doesn't have to be long and tedious, but cleaning all the cupboards on one day seems too overwhelming to me. 

Here's how I clean out a cupboard:
  1. Empty off top shelf.
  2. Wipe down that shelf (careful not to spill dirt into bottom dishes.)
  3. Put the dishes back on that shelf.
  4. Continue on to the remainder shelves, from top to bottom.

 
Back to the refrigerator! This is what you will need to clean today:
  1. Scrubby Corner Cloth - You could use the regular Envirocloth, but that little scrubby corner was extremely helpful for getting the dried up food stains off!
  2. Descaler - You only need this if you have an water tray on the front of your refrigerator that has lime stains from the water on it.  This is the ONLY chemical that we will be using other than water.  It contains Glucuronic Acid, orange peels and Sodium Gluconate.  This is so much better for the environment than the toxic alternatives!
  3. Vacuum that reverses the air (blows the air), if possible.


Tips to Clean the Refrigerator:
  • Clean from the top to bottom.  Then if crumbs, or food drops to those shelves underneath, it won't get what I've already cleaned dirty.
  • I clean one shelf at a time. Clear it off, wash it down with a wet (water only) Scrubby Corner Cloth
  • Often, to save time, I'll move everything to one side, wash the shelf, then move it to the other and finish the shelf.  (See above photo)
Before using the Window Cloth

After using the Window Cloth
  •  After washing it down, I use the Window Cloth to polish the cloth.  This makes the shelf really shiny, and less susceptible to fogging up, at least for awhile!  If you look at the two pictures above of the same shelf before and after using the Window Cloth.

  • I leave the shelves in the refrigerator while cleaning, unless something has spilled down the sides that just don't come off with a wipe down. That scrubby corner really works on all the cracks and sugary spills!
  • Take out the drawers to wipe down with the Scrubby Corner Cloth.  I only run these under water if, it's a smaller drawer and fits into my sink.
  • Don't forget to wash that gasket around the door, as well as the door where the gasket meets.  This will give your refrigerator a nice tight seal, and air won't leak in or out!
Spray Descaler on and let it sit for 5-10 minutes.

Check out the lime ring in the bottom of the ice dispenser!
 

After Descaler - it's not entirely gone, but much improved!  This is from years of build-up, so it should be better the next couple of times I clean it!

  • Clean out the freezer too!  This is much easier in my freezer, because most of the shelves are racks, and the crumbs fall thru, leaving the mess in those 2 bottom drawers and the bottom shelf.

  • Wipe down and declutter the front of your refrigerator.  This makes it look like a clean appliance!
Finally, don't forget about the back and underneath your refrigerator!
For the floor and the wall, I used The Superior Mop System to wash it all down.  Yes, I used a mop to wash the wall! It was so awesome and fast!


Whew!  There you have it!  My tips for cleaning the refrigerator out (as well as one cupboard!)  I don't dwell on this job.  Overall, it took me only about 30 minutes to clean inside and out, as well as get rid of some bad food!  Usually, I do this cleaning 2-3 times a year, and wipe down individual shelves here and there, as they look bad.  I love a clean refrigerator, how about you? Join me tomorrow for the next day's Green Deep Cleaning inspiration and tips!